Integrating Albumentations library in Keras Sequence for image data augmentation
While trying to solve a computer vision task I came to a problem of needing a lot of specific training data, as a dataset similar to my task wasn’t readily available.
Soon after deciding to build my own dataset, I realized that it would take a long time to collect and label all of data, thus I realized it’d be convenient to perform some kind of data augmentation, a technique used to increase the number of samples (images in our case) in a dataset by applying realistic transformations (i.e. flip, rotation, scaling, etc.).
Having previously used data agumentation in a mostly manual way, I was a bit prudent with the idea of doing it manually (i.e. due to a manual handling of labels, keypoint coordinates etc.).
Albumentations library
After a brief search I came across a simple but well-done library called Albumentations. The problem I found with this library however, was that it was slightly intimidating at first, providing either very simple examples of single image augmentation or examples with heavy boilerplate code, hence why this post will try to focus on providing a simple code example on how to integrate Keras Sequence with Albumentations library.
Integrating in Keras
Note: to better follow this post, clone the example repository, which contains the used data and code.
Fixing seed
First and foremost, for reproducibility reasons, we’ll fix the random seed:
import numpy as np
import random
np.random.seed(43)
random.seed(43)
Utility functions
Then we are going to define two utility functions, needed for image loading and visualization:
import cv2
import matplotlib.pyplot as plt
def load_image(path):
    image = cv2.imread(path)
    image = cv2.cvtColor(image, cv2.COLOR_BGR2RGB)
    return image

def display_images(image_batch, cols=8, rows=4):
    height, width = image_batch.shape[1:3]
    reshaped = np.reshape(image_batch, (rows, cols, height, width, 3)) \
            .transpose(0, 2, 1, 3, 4) \
            .reshape(rows*height, cols * width, 3)
    plt.imshow(reshaped)
    plt.axis('off')
    plt.show()
Preview data
The previous two functions allow us to visualize the images present in ./images directory that we’ll be working with:
import os
import numpy as np

data_root = "./images"
images = np.array([
    load_image(os.path.join(data_root, filename))
    for filename in os.listdir(data_root)
])

display_images(images, cols=3, rows=1)
This will load and output our set of three images:

Single image augmentation
Then, let us define a simple augmenter function:
import albumentations as A

augmenter = A.Compose([
    A.RandomBrightnessContrast(p=0.8),
    A.HorizontalFlip(p=0.5)
])
This transformation will first randomly (with a probability of 0.8) change brightness and contrast of an image, then it will randomly flip the image horizontally (with a probability of 0.5).
Note: In case we want a transformation to be always applied, we can set p=1.0, making transformation a certain event.
Although they’re out of scope of this post, more complex augmenter functions can be easily defined by chaining different transforms together in similar fashion as the example above.
To augment a single image/batch of images, it is enough to apply augmenter:
aug_image = augmenter(image=images[0])['image']
Note: augmenter will return a dictionary containing the augmented image/images, and eventually other stuff like keypoints or labels if they were also required to be augmented. We’ll take only the images, as we aren’t augmenting keypoints or labels.
Sequence augmentation
As we want to generate an arbitrary number of images, given our dataset (three images in this case), we’ll need to define a Keras data sequence, that will sample an image from our data and augment it. To generate a batch using this method, we’ll perform sampling and augmentation until enough samples for our batch are generated.
The code below implements a basic keras.Sequence subclass to perform this task:
import numpy as np
import os
import random

from tensorflow.keras.utils import Sequence

class DataSequence(Sequence):

    def __init__(self, data_root, batch_size, n_batches, augmenter, preprocess=lambda x: x):
        self.batch_size = batch_size
        self.n_batches = n_batches
        self.augmenter = augmenter
        self.preprocess = preprocess
        # Get a list of images
        self.im_list = [
            os.path.join(data_root, filename)
            for filename in os.listdir(data_root)
        ]
        self.n_avail_images = len(self.im_list)
        # Decide sampling function:
        # - If batch size is greater than number of available samples,
        #   then sample with replacement (allow repetitions)
        # - Otherwise, sample without replacement (don't allow repetitions)
        self.sample = random.choices if batch_size >= self.n_avail_images else random.sample

    def __len__(self):
        return self.n_batches

    def __getitem__(self, batch_index):
        # Sample batch_size indices from our images list
        image_indexes = self.sample(range(self.n_avail_images), k=self.batch_size)
        batch_x = []
        batch_y = []
        # foreach sampled image index
        for image_idx in image_indexes:
            # get image path
            image_path = self.im_list[image_idx]
            # load image from path
            image = load_image(image_path)
            # apply augmentation
            image = self.augmenter(image=image)['image']
            # preprocess image
            image = self.preprocess(image)
            batch_x.append(image)
            # add a constant target value just for example completeness,
            # (in a real scenario it would be loaded somehow)
            batch_y.append(1)
        # convert to numpy array
        batch_x = np.array(batch_x, dtype=np.float32)
        batch_y = np.array(batch_y, dtype=np.float32)
        return batch_x, batch_y
This class gives us a base structure for image augmentation, as it will yield us a desired number of batches each containing a desired number of samples/images.
We can now instantiate the DataSequence object:
batch_size = 32
n_batches = 8
augmenter = A.Compose([
    A.RandomBrightnessContrast(p=0.8),
    A.HorizontalFlip(p=0.5)
])
preprocess = lambda x: x / 255.0

data_seq = DataSequence('./images', batch_size, n_batches, augmenter, preprocess=preprocess)
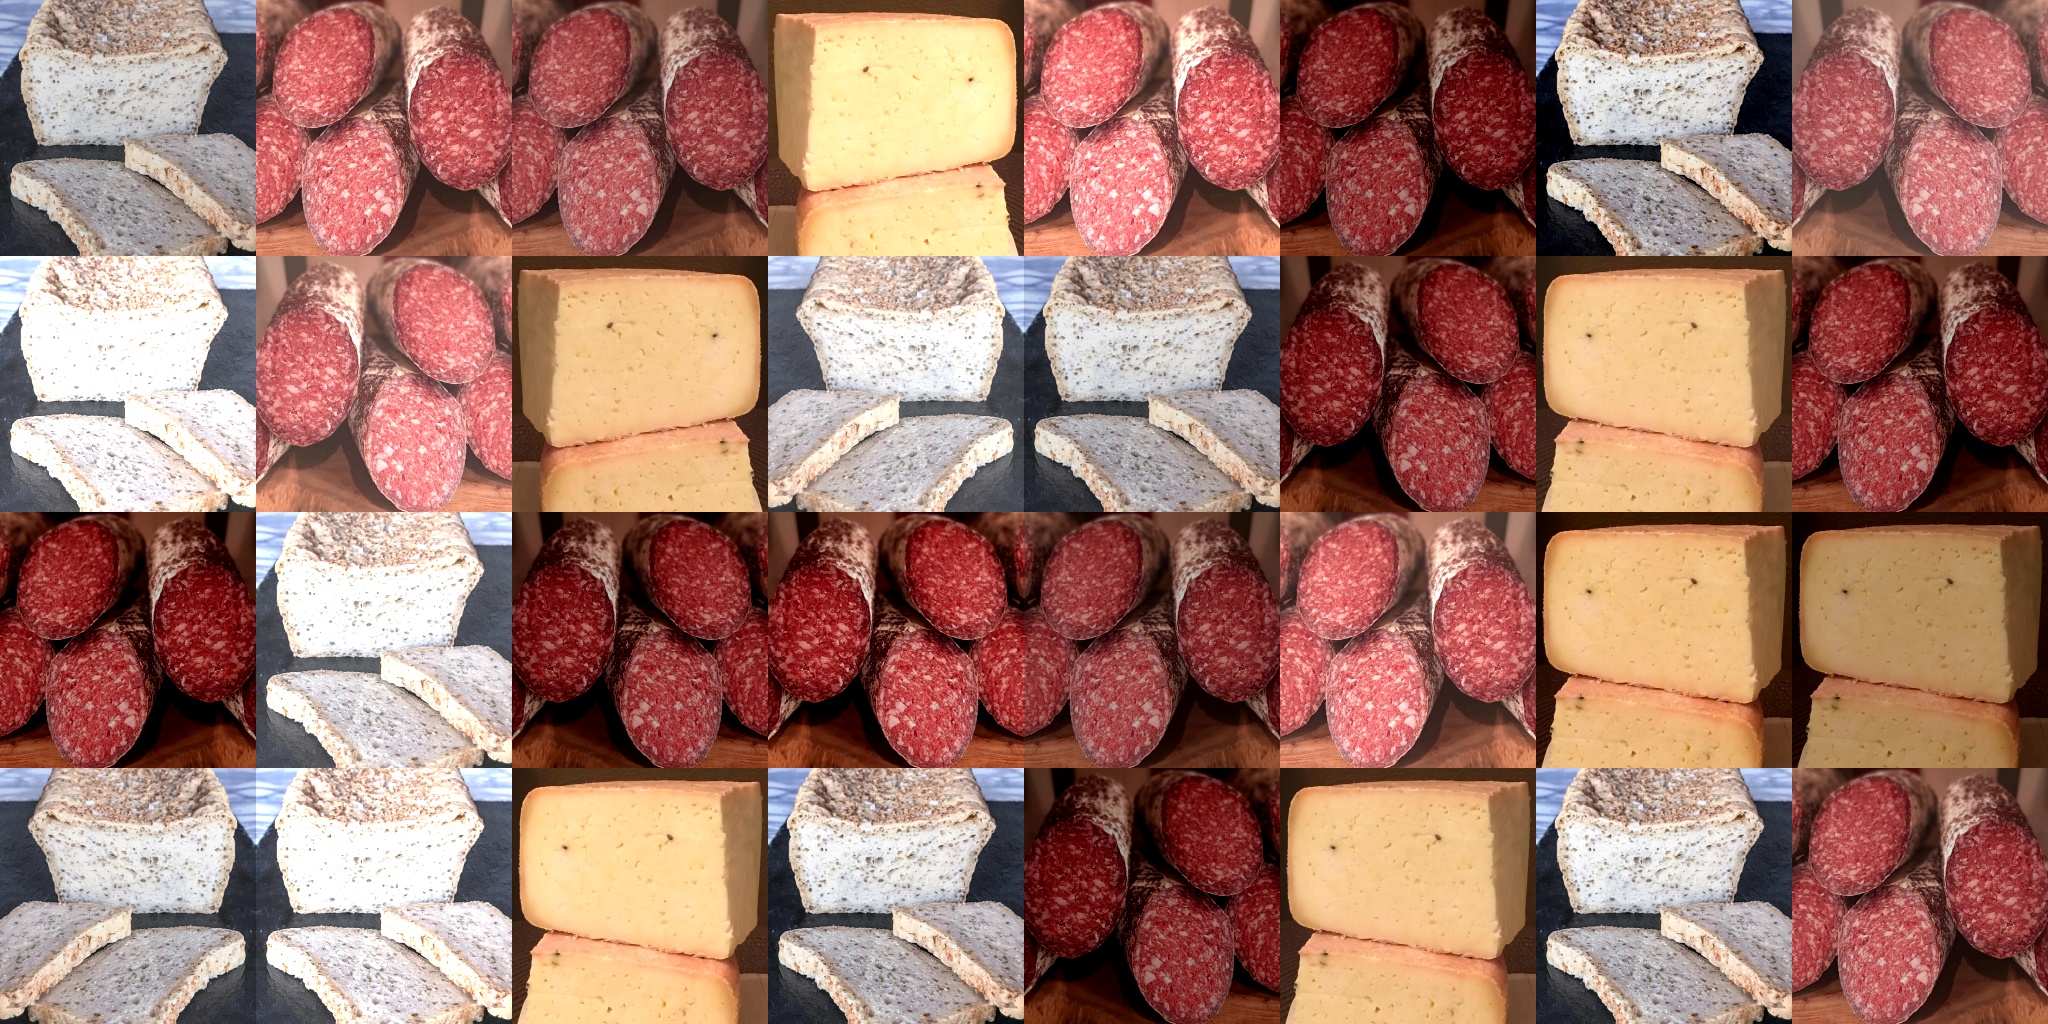
To inspect if our augmentation is working, we can view some samples yielded by data_seq object:
images, labels = next(iter(data_seq))
display_images(images)
This will produce the following output:

As we can notice, the augmentation is working, however our images look very similar, as we initially started with only 3 images.
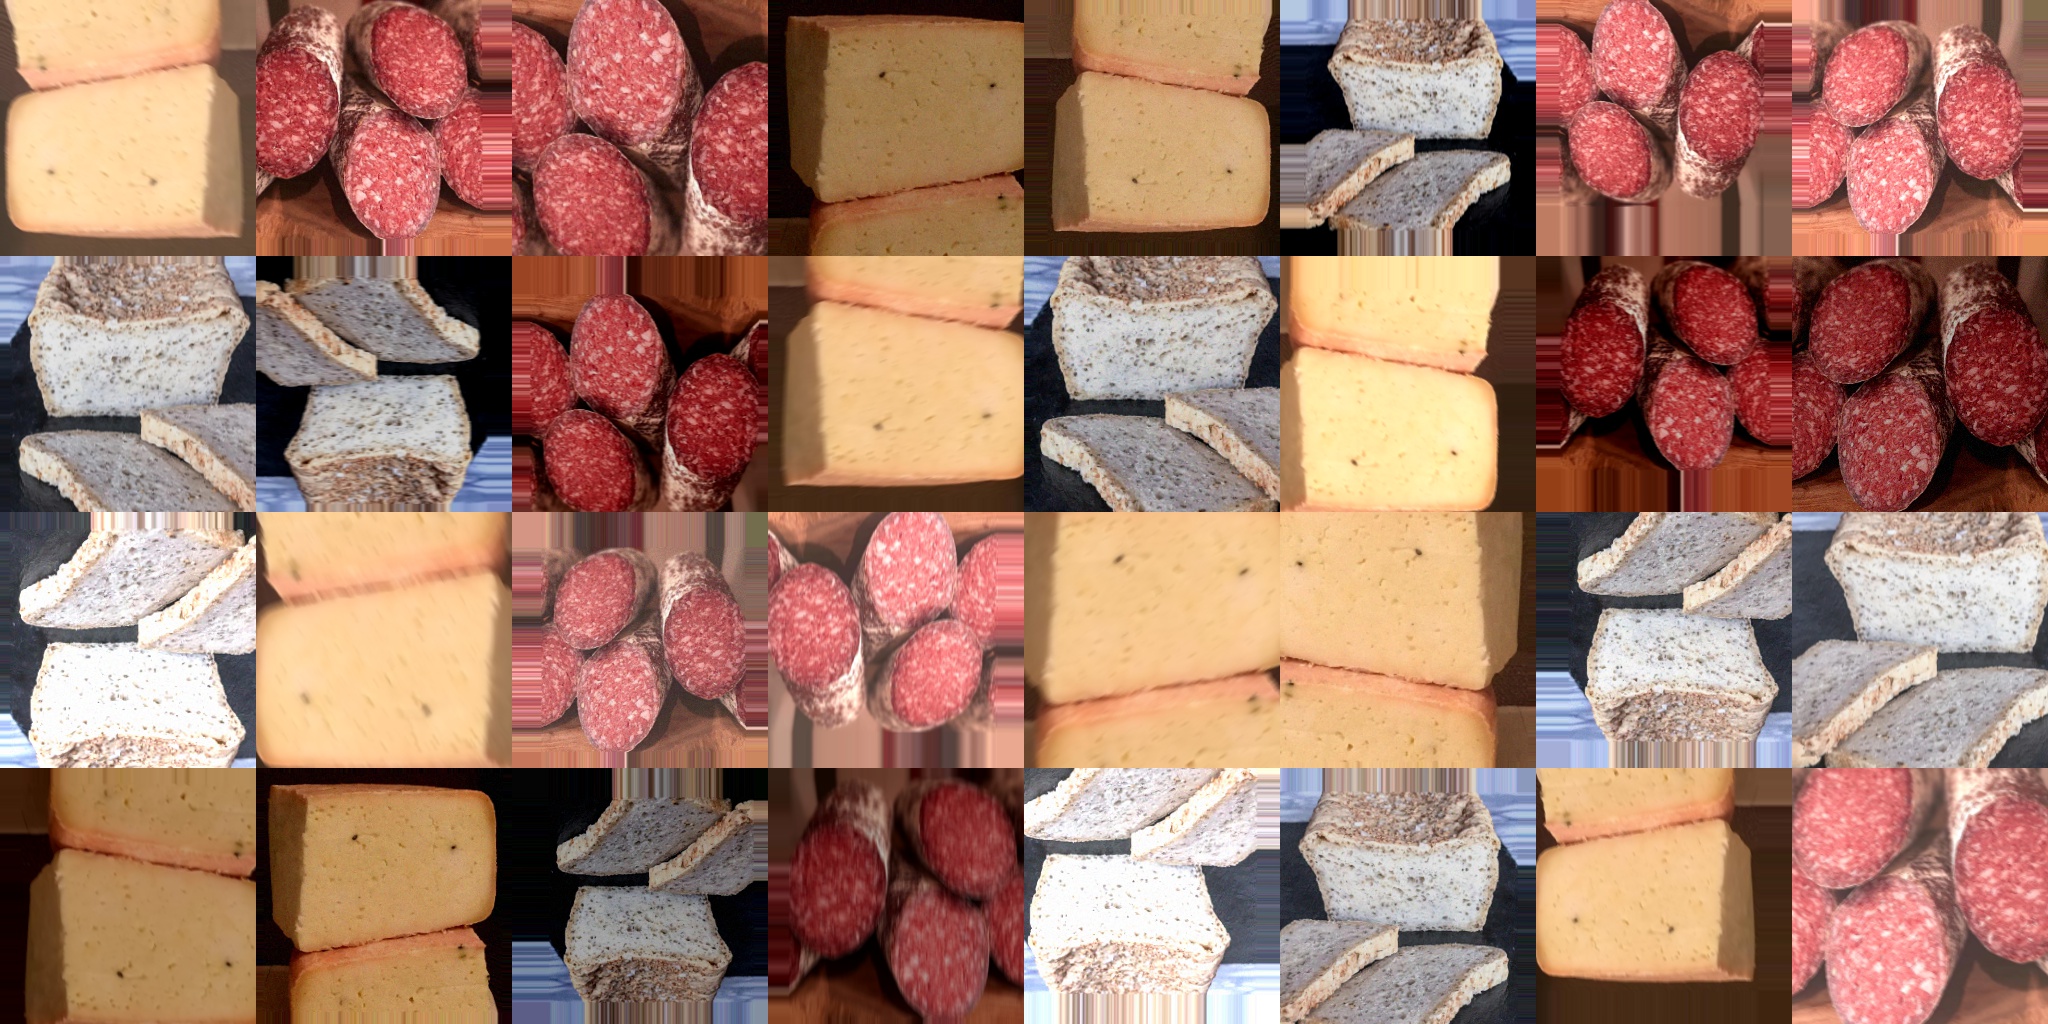
To obtain diverse samples given a low number of available images, we’ll need to apply “more aggressive” transformations, such as:
augmenter = A.Compose([
    A.RandomBrightnessContrast(p=0.8),
    A.OneOf([
        A.MotionBlur(blur_limit=12, p=1),
        A.GaussNoise(var_limit=(10, 50), p=1)
    ], p=1),
    A.VerticalFlip(p=0.5),
    A.HorizontalFlip(p=0.5),
    A.ShiftScaleRotate(
        shift_limit=0.1,
        scale_limit=0.2,
        rotate_limit=0.3,
        p=0.9,
        border_mode=cv2.BORDER_REPLICATE
    )
])
Which will give us a better, more variable set of images:

Note: althought we got diverse images, it is always preferable to gather more training data to better exploit the augmentation process.
Training integration
The code we’ve defined and tested above, is not limited to be used as a generator only, as our initial goal was to integrate it with Keras’s model training.
Assuming we have defined a Keras model, we can use our data generator to fit our model like we’d normally do with a tf.keras.utils.Sequence:
model.fit(data_seq, epochs=N_EPOCHS)
Conclusions
We’ve seen that given a set of few images, we can perform sampling and augmentations to increase our training set size. Although the augmented images look very similar (in our case we had to use relatively complex transforms to obtain some diversity), we could still use this technique to increase the total number of different images in our training data “for free”.
Of course, this is not a silver bullet, as a bigger improvement would normally come from gathering more images and using them together with the explained technique to increasingly train our model. This could also allow us to automatically annotate a set of new images, once our model has been trained on a smaller set of augmented images.
Leave a comment